Our newly updated game, My Talking Hank: Islands, is set on a tropical island inhabited by a group of fun and friendly animals, each of which has different interests and activities. When brainstorming possible activities, we decided to develop something around a hair salon, where players could groom a lion’s mane.
Before we get into the details of the project, let me introduce myself.
My name is Marko Ravnjak and I’ve been with Outfit7 since 2015. I work as a Senior Software Engineer, and the scope of my work ranges across all the programming aspects of game development, from making tools and editors to writing libraries and core systems, to actual game logic and features. So, let’s get down to it!
The concept of this feature was divided into a few steps:


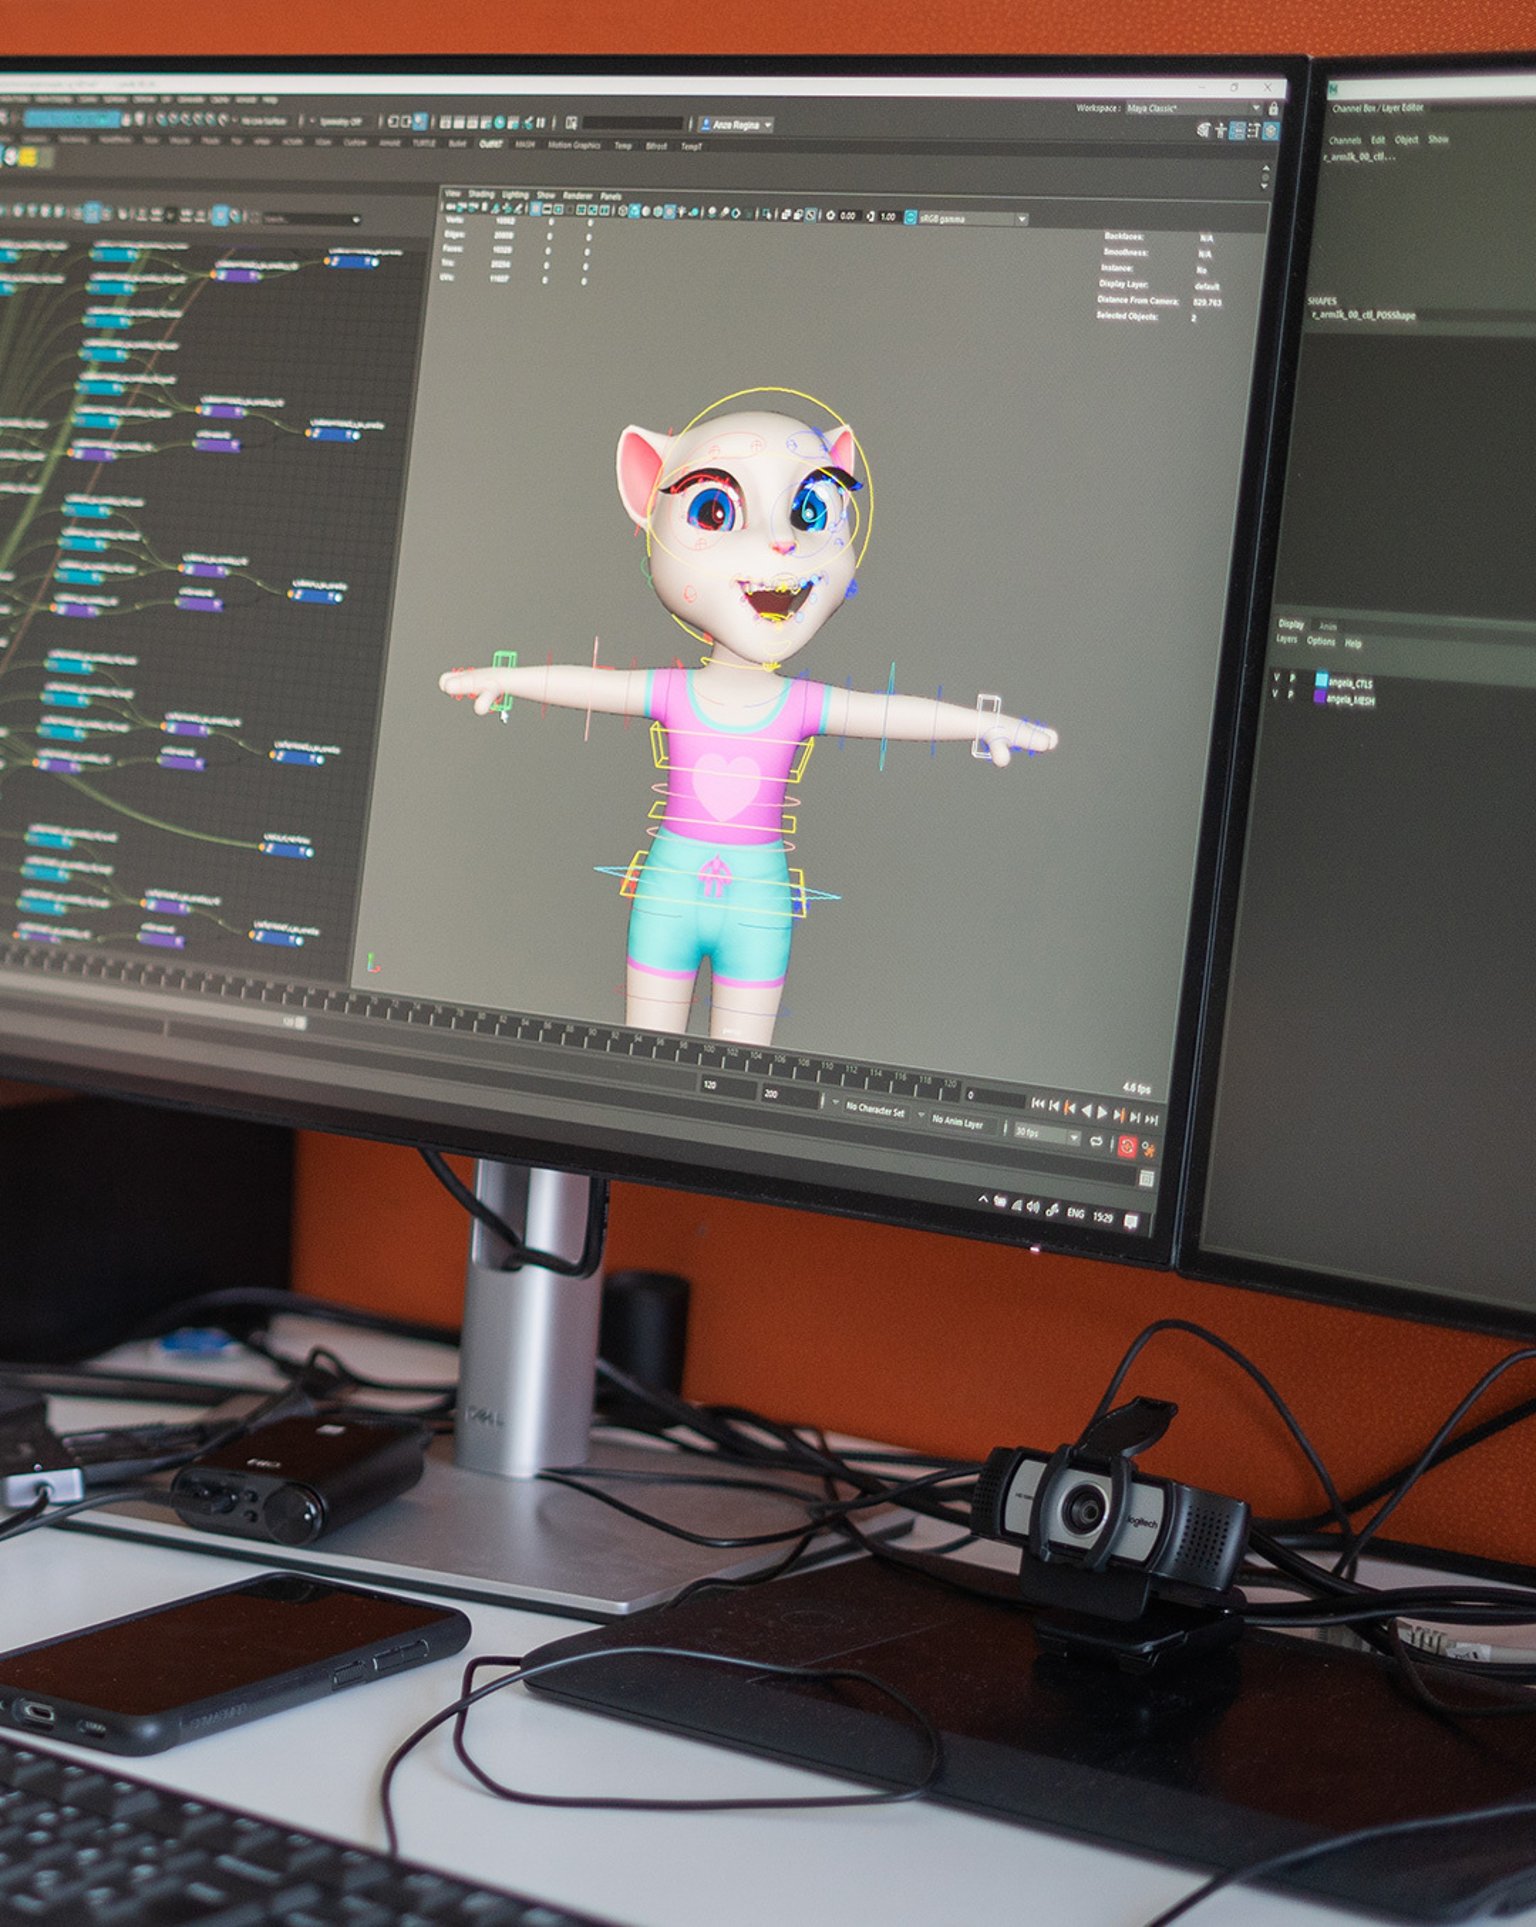
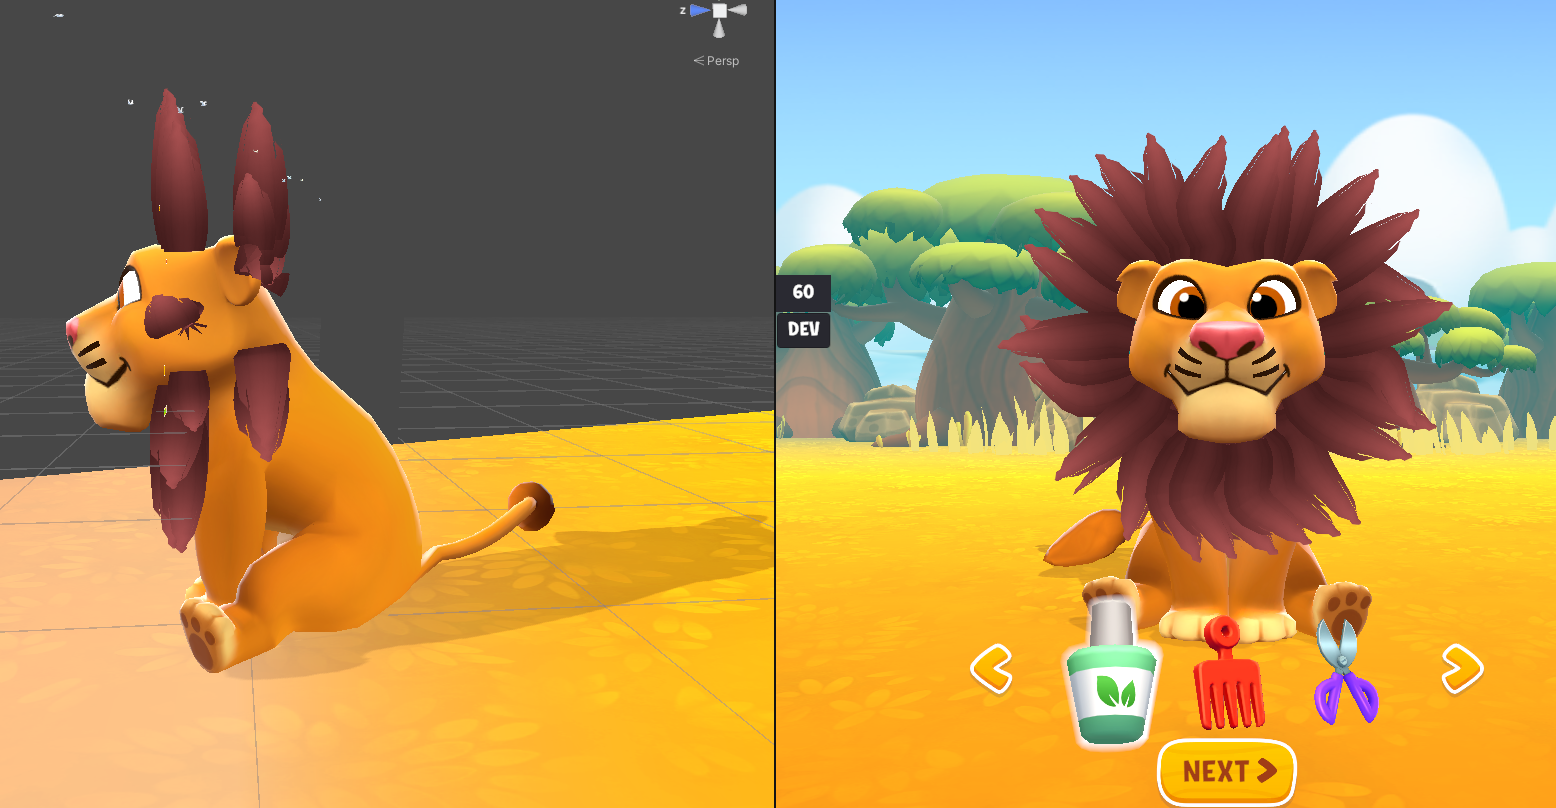
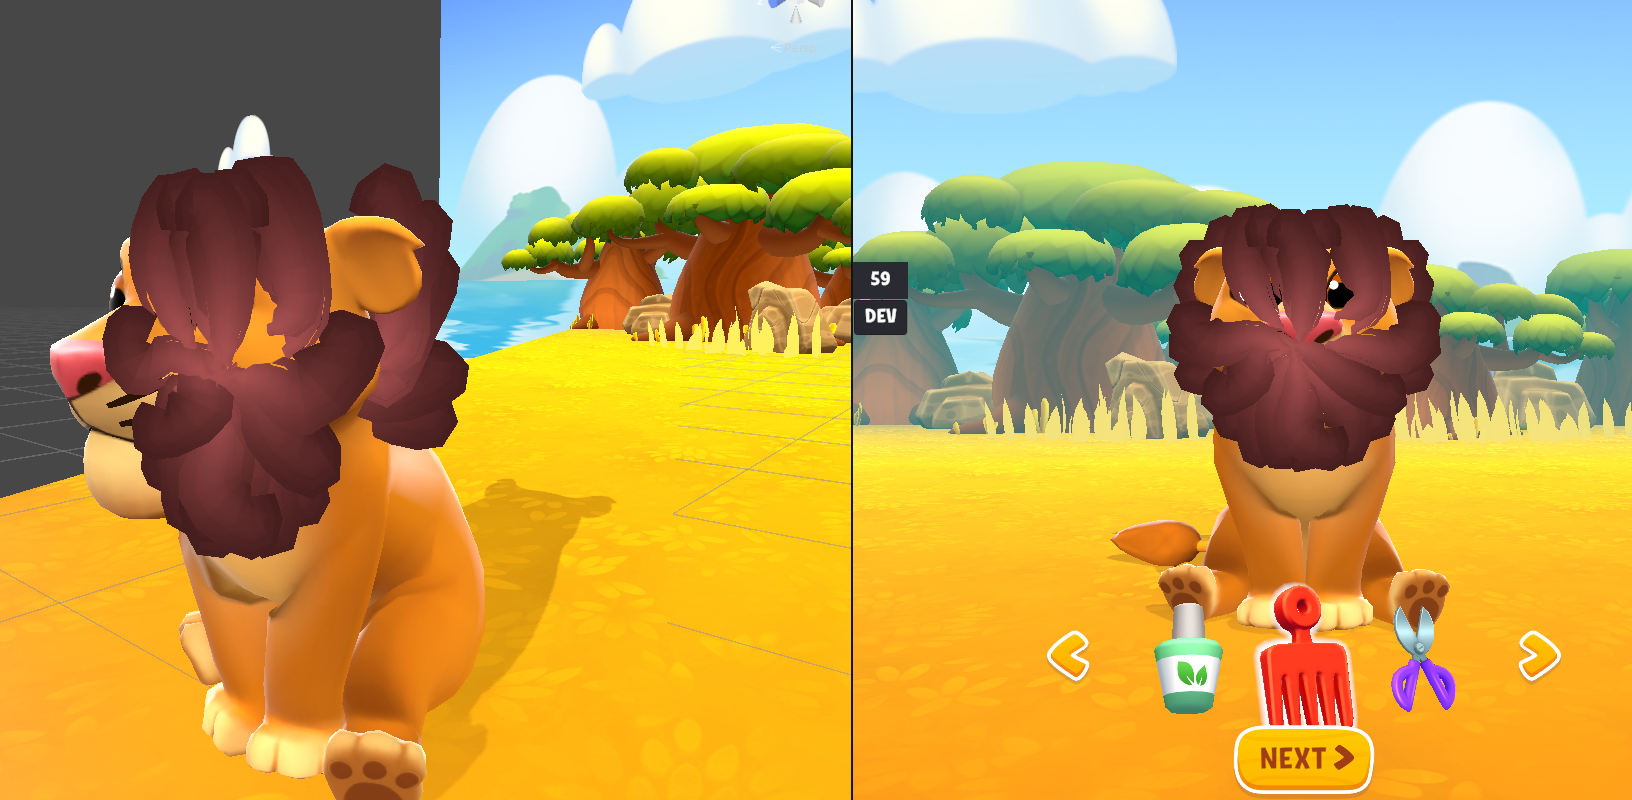
My Talking Hank: Islands was being developed with Unity, so I tried to use/reuse components and systems as much as possible. The basic idea was to have a front-facing lion with hair strands covering its head. Each strand would be a 2D object, also oriented towards the front. For such objects, a line renderer is the optimal choice. A line renderer is a dynamic mesh, generated from a set of positions. Together with line width, each position defines a segment of the line so that you get a continuous strip of triangles.
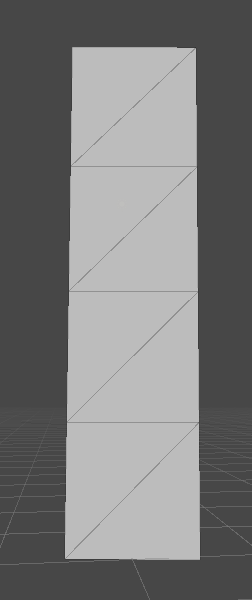
The tricky part with line renderers is the curvature, where segments (if wide enough) can overlap, which the line mesh generator must detect and fix. Fortunately, Unity provides a decent LineRenderer component (it is lacking in one or two areas, but more on that later).
Next, we needed a system that could “drive” these line renderers and allow us to modify the mesh according to our wishes and available tools. We decided to make the hair strands somewhat static, meaning that users can move or drag them around as they wish, but once they stop, the strands stay still (i.e. they don’t fall down). This would allow users to design different hair cuts/shapes without losing their progress, as it were.
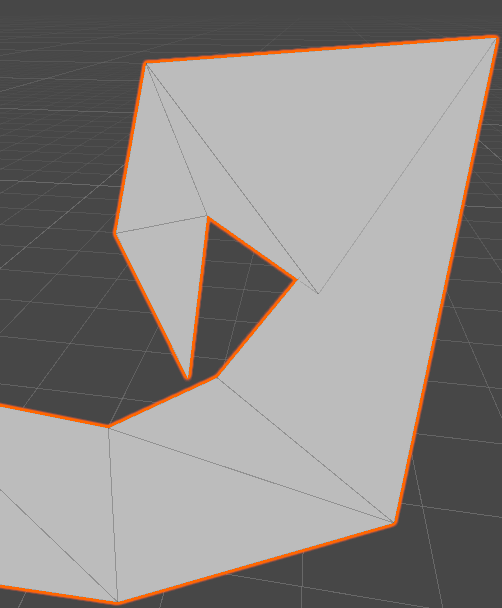
The hair strands also needed to be flexible. They needed to be able to bend without breaking. The obvious solution here would be a spline system, which is a set of control points or so-called “knots” (a position, tangents can also be added) from which smooth, curved lines can be generated.
The first option I tried was Unity’s Spline Package. I’d used this on a previous project and it had worked well, offering great editing tools while being easy to use.
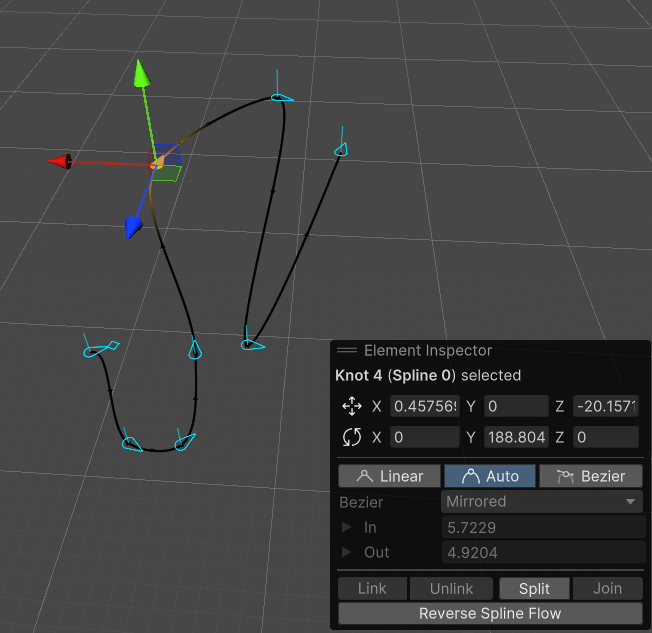
But, as it turned out, the Unity Splines Package wasn’t really meant for runtime editing. We’d previously used it to define a path across a level (editor time) where a player was moving during gameplay. In this instance, the spline wasn’t being changed during runtime, only evaluated (meaning getting the position and tangent at at a given time). Editing the spline data and rebuilding it in runtime turned out to be inefficient (mostly memory-wise - GC) for the My Talking Hank: Islands project.
I reverted to the good old Catmull-Rom spline. This option was a bit simpler (where a knot is a simple position), but I figured that the runtime calculation would be fast enough. Once I replaced the data and the supporting code, the performance was much better and no GC was triggered.
At this point, we had a spline that could be evaluated and from which line renderer positions could be generated. By doing this in an update loop (whenever a knot is moved) the line renderer is regenerated and the mesh updates accordingly.
Once the line renderer was rigged with a spline, it was time to simulate the knots. For knots to behave like actual hair, some semi-proper physics had to be applied. When it comes to hair systems, spring physics is most often used. A quick Google search will yield thousands of examples, most of which use numerical integration methods to solve the systems (read up on the Euler and Verlet integration). The bottom line is that Verlet’s method provides better results but requires extra overhead, as multiple updates are needed per frame update.
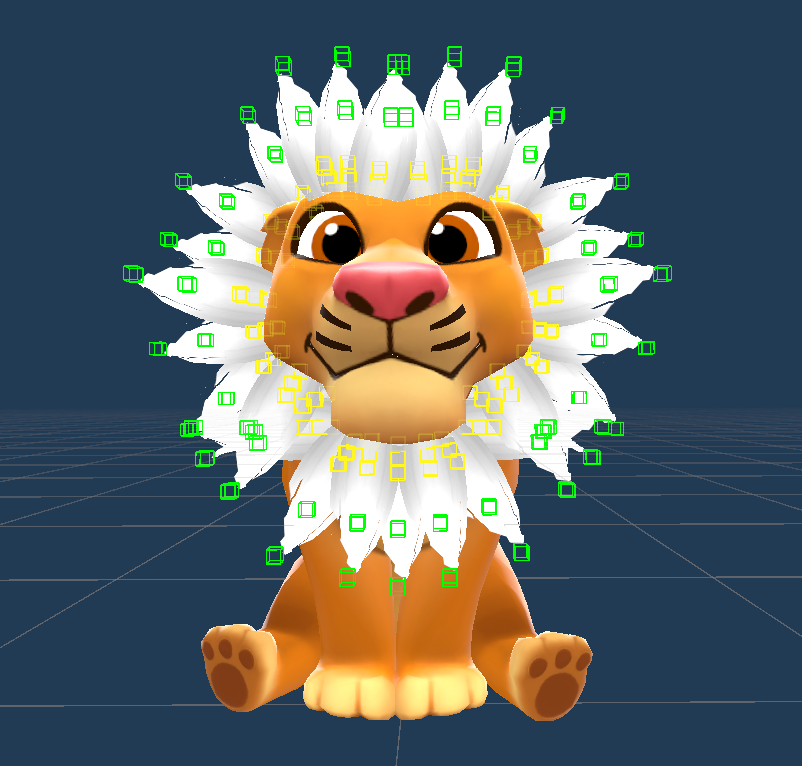
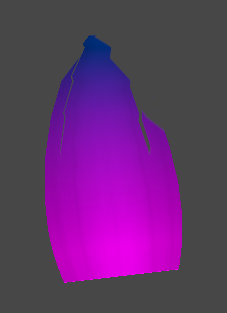
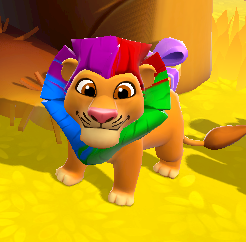
After some number-tweaking, I managed to create something like a heavy hair/gel hair system, so that the hair would behave statically. During initial testing I figured out that six to eight knots was enough. In the image above, the yellow ones are fixed (they can only rotate if needed/allowed), while the green ones can move. This was necessary in order for the strands to act like they were attached to the head. Without it, they would have moved and rotated freely.
Spring logic handles distance and rotation constraints. In this case, the rotation constraint was set to 150 degrees, while the spring settings were stiff, in order to prevent stretching.
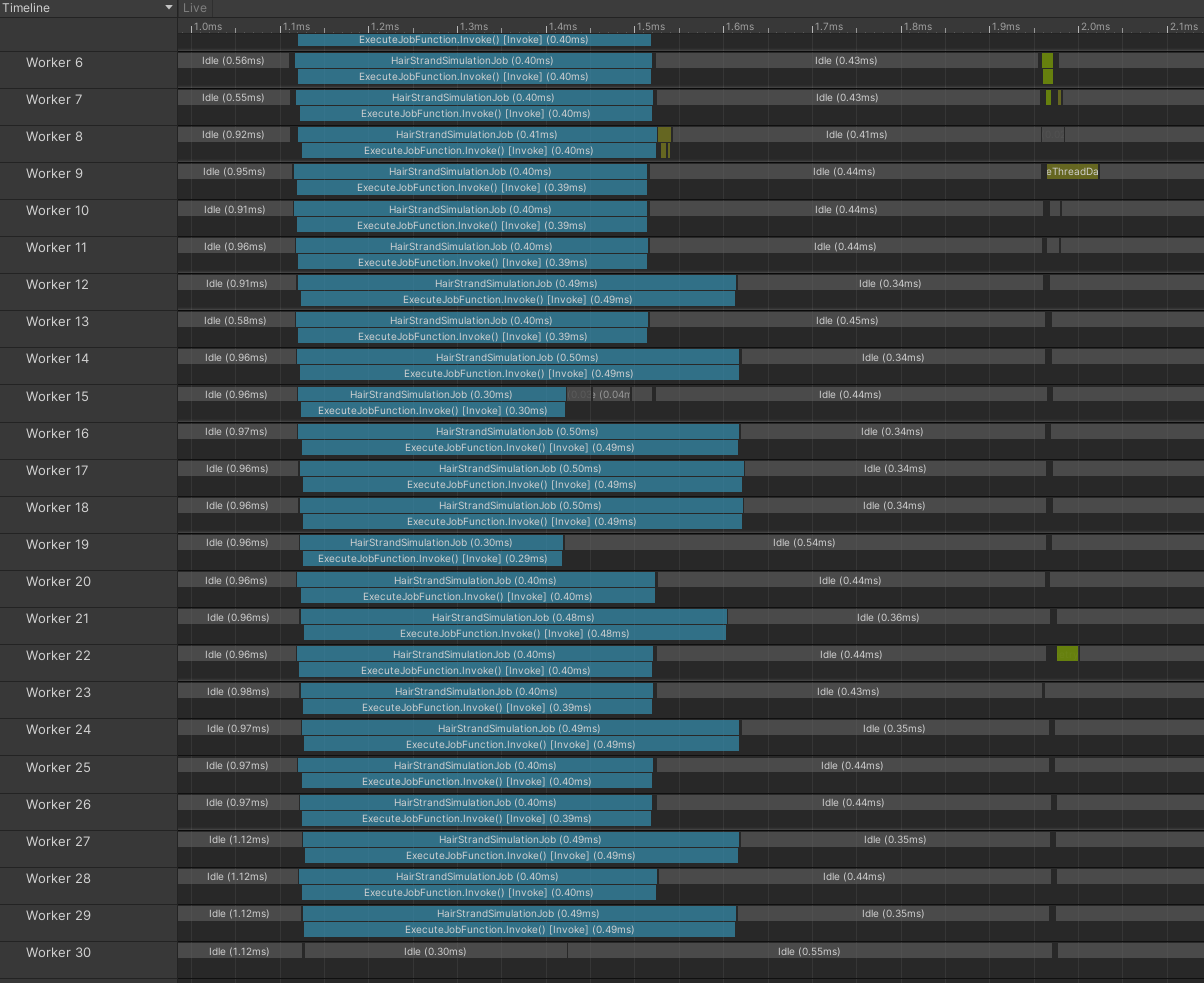
However, once I actually started using multiple hair strands (approximately 30), the runtime calculations started causing hiccups. This was nothing major, but on lower devices it was still taking 10-20ms, which was enough to dip the fps (integration steps were in the 30s range).
Thankfully, we live in an era of multiprocessors and parallel processing! We have an internal system for determining approximate device capability (based on CPU/GPU/mem) and even the devices we mark as “low” have at least a few CPU cores. Conveniently, Unity has a decent job system, which can utilize multiple CPUs. I ended up using IJobParallelFor.
In a nutshell, you provide a list of elements (via NativeArray<>) and call up a schedule function. The internal system then does its magic and for each element in the list you get an Execute(index) call, giving you the index of the target element, on which you can now operate.
Want to hear the cool part? Execute gets called from multiple threads. The concept is data isolation: each thread operates on a single array element, preventing data contention. Because the data is isolated, no locking mechanisms are needed. If you attempt to access data outside your assigned index, Unity will generate an error.
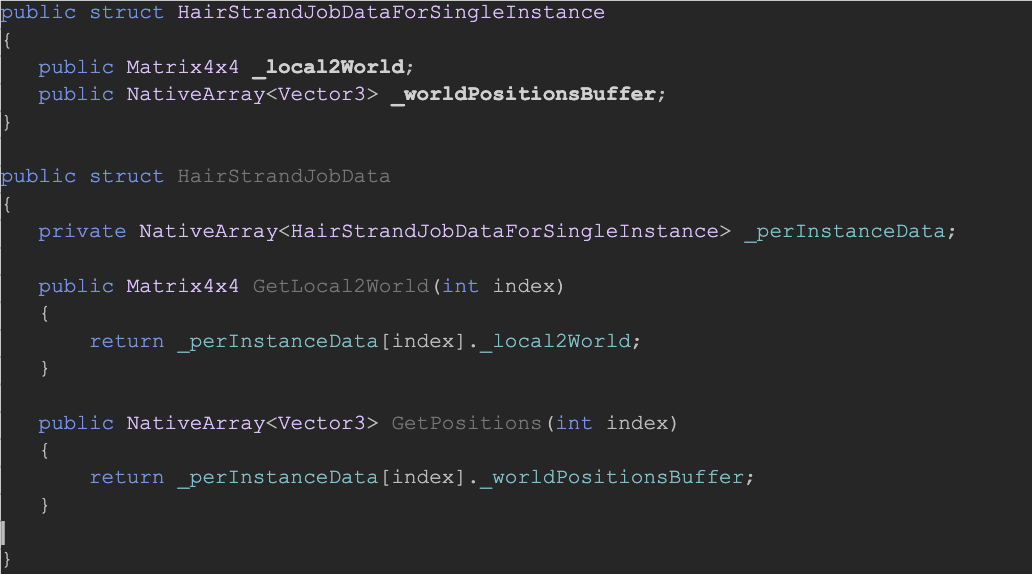
The not-so-cool part? Nested containers can’t be used directly, meaning I cannot create a nice struct with a nested array of other structs and use that as a data element for the parallel job. It’s possible to manually create the structure handler/allocator, but that seemed like too much extra work to be worth the hassle. Another option I wanted to avoid was unsafe, which would give me full control and full responsibility over the memory. I would have to handle allocation, tracking and cleanup. Essentially, doing everything yourself (as in c/c++).
If nested containers worked out of the box, you could write something like this:
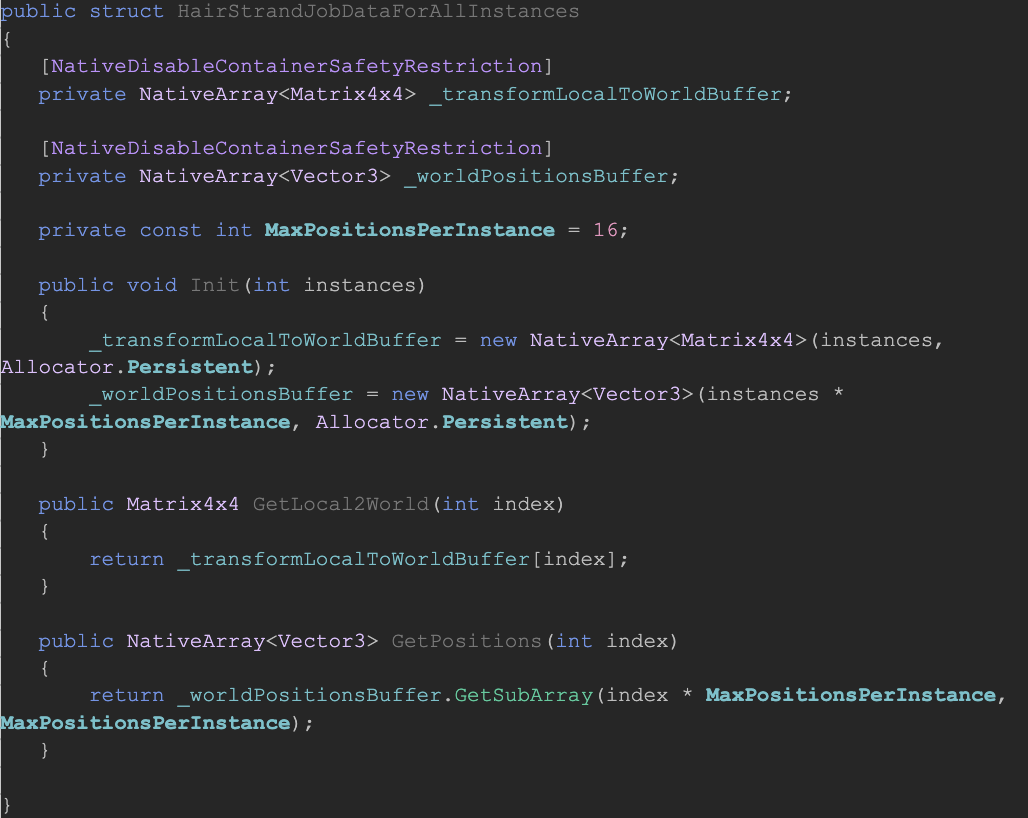
Thankfully, I found a reference to the NativeDisableContainerSafetyRestriction attribute, which allowed me to access multiple data elements without warnings and errors being thrown up – not just my index ones. So, I ended up unrolling the data in an SoA (Structure Of Arrays) manner. I had one array for matrices (one per strand) one array for positions (strands max_positions), etc. If I needed to access positions for an nth strand, its starting position would be N max_positions. This was a bit messy but, once implemented, it wasn’t that bad. I just needed to be careful to stay within my index boundaries.
Getting back to the job system, Schedule accepts a count (the number of data elements to be processed – total size) and preferred batch size. Batch size specifies how many elements will be processed at a time, on one thread. Basic logic would dictate that light work leads to a bigger batch size and heavy work means a smaller batch size. Since thread management and context switches all cost resources, running a job for single matrix multiplication doesn’t make sense. It also doesn’t make sense to run 100k multiplications in one job, since this might mean that the associated tasks aren’t evenly or optimally distributed (one job would run 100k, and the other only 2k). But it could make sense to run 256 of them. This was a tradeoff to balance the workload. Just to note, I ended up running a single hair strand on one job (so, batch size: 1). This gave me the overall best results.
Once a job is scheduled, you need to wait for it to be completed. Only after it’s done can you safely resume data access. Between scheduling and waiting, thread workers are spun up, and “execute” is called for each data element. “Wait” is a blocking call, meaning your main thread will pause execution at this point, which is not ideal. Fortunately, you don't need to sit and wait at this point. Instead, you can schedule the job in Update and wait for it in LateUpdate. During this time, Unity runs some of its own workers (like animation). Once finished, you can submit the data for rendering. You just need to update LineRenderer data. All this is safe to do in LateUpdate, after the Wait. Accessing the data while the job system is running (between Run - Wait, Schedule - Complete) will trigger an exception.
The downside to running in Update and waiting in LateUpdate is that if you’re depending on animations (joints and their transforms), you’ll be stuck with an old transform state (local/world matrix), which can cause visual discrepancies (singleframe delays). In our case, this wasn’t an issue, since the animation didn’t cause any noticeable artifacts. But if we had any bigger problems, the only way to handle it would have been to run and wait for the jobs in LateUpdate.

With performance issues out of the way, it was finally time to move on!
Next came the tools. We wanted to make sure to incorporate an array of different tools so that players could get creative. We went for:
Comb/brush
Scissors
Magic growth potion
Color sprays
Accessories
The first (and most obvious) tool was a comb. Upon activating the tool, players could drag the tool with their fingers, moving around and over the hair strands, pulling them in the input direction.
To accomplish this, I implemented a simple spherical pickup and release logic for knots. When a knot was in range, it was added to the manipulated list. When out of range, it was removed from the list. For each manipulated knot, I added a drag position offset based on user input, basically offsetting it in space. Initially, I implemented this by adding force to the knot, but this approach didn’t work well with quick swipes, since the time with which the knots were affected was too short.
Later, we added a secondary comb (the precision one). The only big difference here was the pickup logic. It didn’t pick up all knots in range, but instead found the closest one and locked on to its parent hair strand, essentially allowing you to manipulate a single strand.
Our second set of tools included a cutting tool (scissors) and growth spray (aka the “magical cure for baldness”). Of the two, the scissors were trickier to implement.
First, I took the swipe action (start and end position of the user input) and got a 2D screen space line from it. Then I took a brute force approach. For each hair strand, I took the first and second vertex position and converted them into screen space. This gave me a line in the screen space. At that point, I’d have two lines on which I could do a line-to-line intersection. If an intersection was detected, I’d remove the dangling knots and push the last knot to the intersection position. If not, I’d take the second and the third vertex positions, and so on until the last vertex position had been reached. At that point, I’d proceed to the next strand.
The growth potion required the reverse process. Selected knots served as a list of affected hair strands. For each one, I started growing -> offsetting the last knot away from the previous one. Once a distance threshold was reached, I then created a new knot, and started moving that one away. This process was repeated until the maximum length of the strand was reached.
The last tool in the set is our color spray. To allow users to paint hair, I implemented a logic based on sphere collision (taking the color spray position from the user’s 2D space into the 3D world space) vs. line renderer position to determine which hair strand is affected, as well as which part of the strand. Then, I took that information and mirrored it on a pre-created color texture.

This was a hair-by-hair strand texture with a size of 64x16 RGB pixels. I wanted to keep the color textures as small as possible, while maintaining decent quality. Since strands are sort of rectangular in shape, I figured that the textures could also be that shape. Low resolution serves mainly two purposes: lower memory overhead (since we need ~30 textures) and lower CPU cost (due to the process of calculating which part of the texture is being painted over).
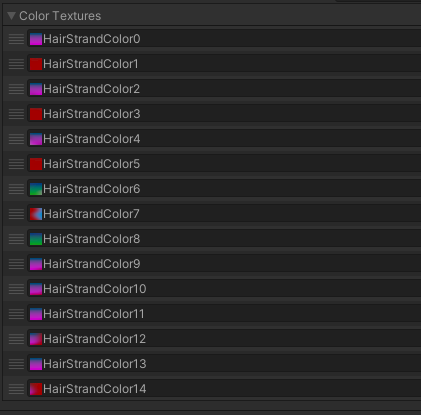
The texture was then used in the line renderer material to multiply it with other textures. (We’ll look closer at the rendering setup below.) Due to the feature setup, once the hair was styled/cut/grown and the coloring stage had started, it’s not possible to go back and modify the hair again. This meant I could simplify the texture coloring, since I could just use the whole color texture independently of the strand length. At this point, color textures were only kept during feature activity (runtime).
One nice feature that required almost no effort was the ability to use gradient colors. A color spray can define a number of colors (Unity’s Gradient) and, when coloring, the relative position offset on a strand can be used as the interpolator, which generates nice gradient patterns on the hair.

What about rendering? Well, one feature I found missing in LineRenderer was the ability to provide custom UVs with positions. This would have solved a few issues. Our final setup looked like this:

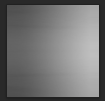

We have a base opacity texture, which we use to define the shape of the tip. Next, we have the pattern texture (monochrome) which defines the pattern on the strand. This pattern texture is then multiplied in shader with the color map, which is, by default, populated with a yellowish brown color. Once the user starts painting, that color is overridden.
When hair got cut, we wanted the tip to stay the same shape. To achieve this, I simply moved the opacity texture UVs in the shader. The same logic applies when the hair is grown.
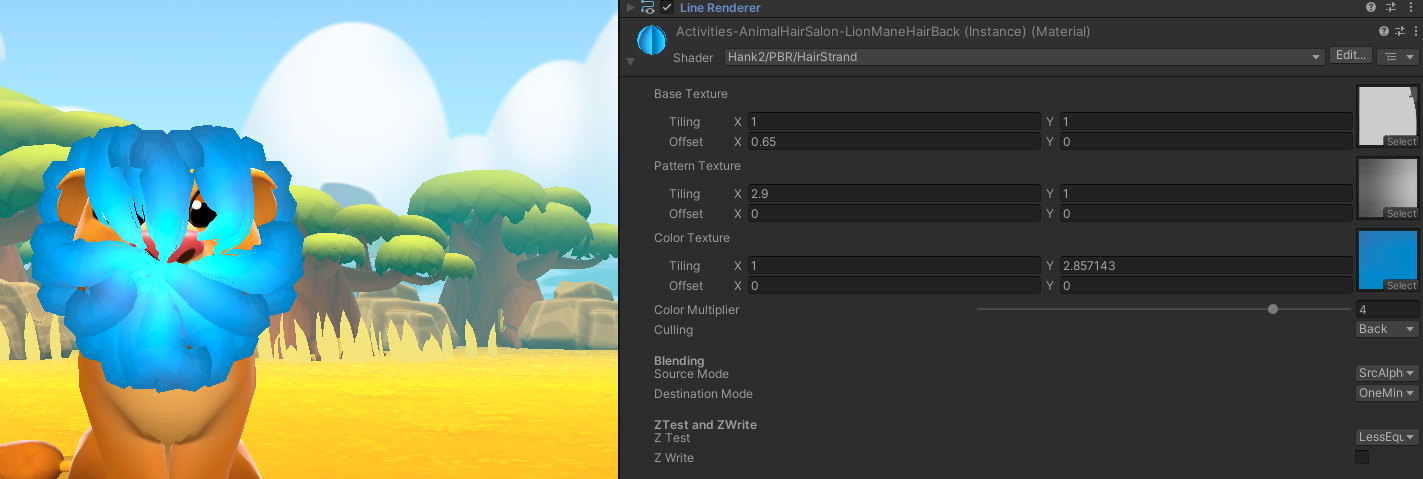
In "normal" rendering, objects are rendered based on their order and depth using Z-depth testing. In the case of the hair, this would mean that strands pulled over the head would be rendered inside the head, making them partially invisible. To counteract this, we created two sets of strands, one back and one front. The back strands are rendered regularly, as we want them to be hidden behind the head, ears, etc. For the front ones we disabled regular Z-depth testing and implemented a higher render queue setting, forcing the strands to render over the head mesh. The one downside to this was that the strand “root” then also rendered over the head, meaning we’d have to position them really precisely, or hide them with something like fur.
Now only one step remained: accessories. I programmatically determined (again, with simple radius checks) which knots I can enable the “decoration” slot (the circle icon) on. In addition to these, we’d agreed to have a few predetermined slots on the lion’s head.
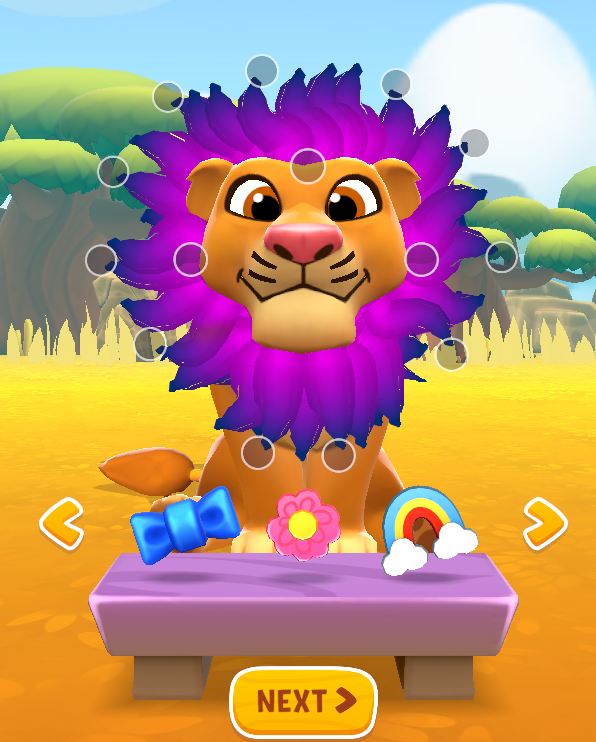
The circles show where the accessories can be placed. The user can pick them up and drag them to the desired location, where they lock into place. Tap/click can also be used to either add or remove accessories.
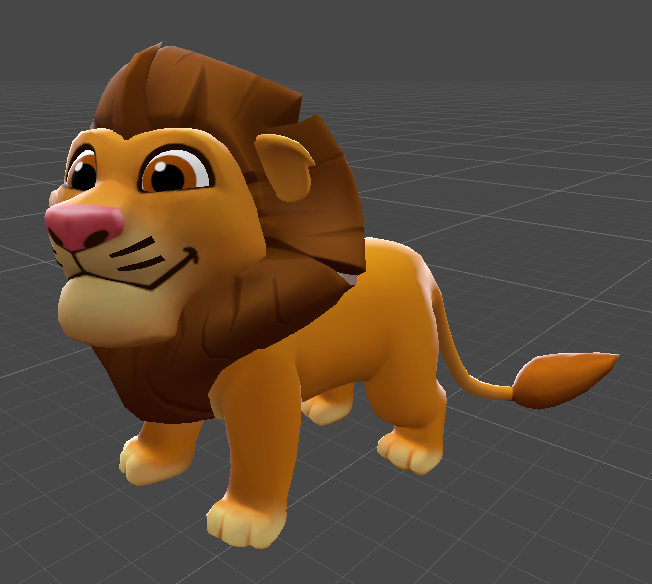
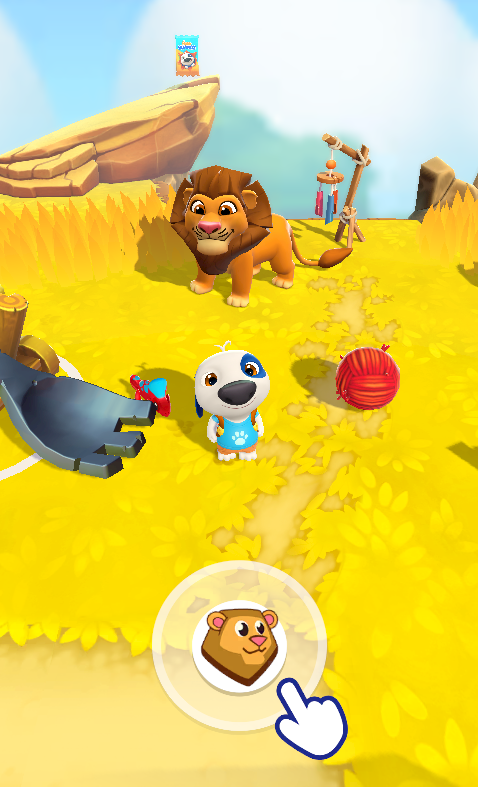
After finishing up the main features and ironing out the majority of the bugs, our designers wanted one more thing. Even though this activity was fun and engaging, it still felt like something was missing. The actual access point for the hair salon activity is in the lion zone, on the island itself. There, users can see our mighty lion, and can even play with him.
In the first instance, when you finished the hair salon activity, all you were left with was a memory of your incredibly artistic makeover. The lion on the island still had his old, boring mane.
Why not simply transfer hair from the studio to the island, you ask? Well, it’s not quite that straightforward! The island lion’s mane was part of the lion mesh, which was a full 3D mesh rigged with a skeleton animator. Meanwhile, the lion in the activity was using “fake” hair based on 2D strands. So, there we had no simple way of transferring the look from one to the other.
Still, I was asked if there was a way to at least transfer the painted colors to our island lion, if not the whole haircut/style. With the help of our 3D art team, we found a solution. I took the color textures from the hair strands the user painted in the activity and combined them into a single texture. To make this work, I had to order/mark all the strands in a sequential order, basically working clockwise, starting from the top.

But then came the hard part! Usually, the first step would be to create the mesh, where each vertex can have one or more UV sets (coordinates), which then tell the rendering logic which part of the texture goes where on the mesh. Then the artists would paint these “blank” textures.
In this case, though, we had to reverse the task. Since the texture was generated programmatically, our 3D team had to paint the UV set, so that it matched the texture, not the other way around, which isn’t a simple task. Still, our art team delivered – and now we have a colored lion.
I feel a huge sense of accomplishment seeing this feature being used and enjoyed live. I’ve worked on many different game features over the years, but this one felt special because it covered so many different aspects – from design, tech and performance to rendering exploits and other magic. All in all, this was a great project with a great team. Why not download the game and give it a try?